HDI PCB Prototype Quoting: Which Costs Never Amortise
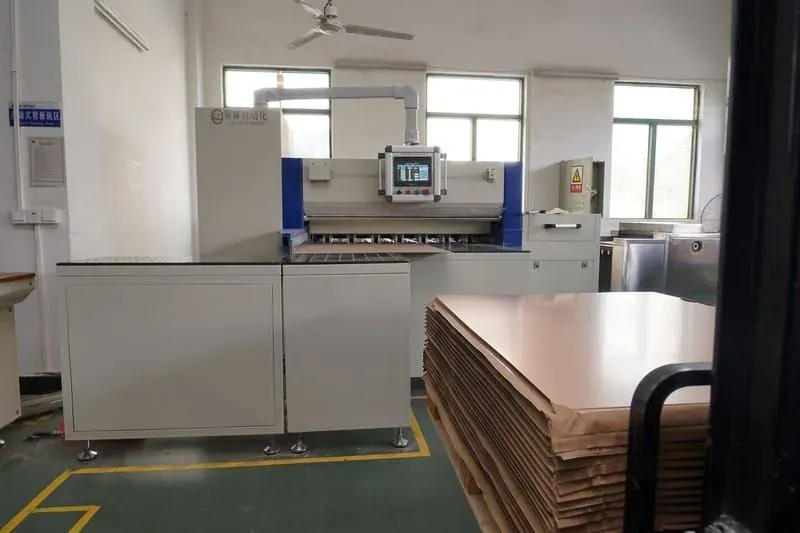
1. A prototype quote is mostly a per-run purchase, not a per-piece one
When you compare an HDI PCB prototype quote against the unit price you were shown for a production run, the gap looks unreasonable. It usually is not. The reason is structural: most of what an HDI build consumes is spent once per run regardless of how many pieces come out of it, and prototype quantities give that fixed spend nowhere to hide.
Think about what physically happens between your data pack and a delivered board. Someone reviews the design against the process window and raises DFM questions. Tooling data is generated: drill programs for each laser-drilled span, imaging data for every layer, a routing program for the outline, an electrical test program derived from your netlist. Material is cut from stock sheets. The panel array is laid out. The build-up sequence runs its lamination and drilling cycles in order. Each of those steps happens once for the run. None of them gets cheaper because you ordered five pieces instead of five hundred.
What actually varies with quantity is narrower than most first-time buyers expect: raw material consumed, the number of panels processed through wet chemistry, and the labour and machine time that scales with piece count. On a conventional two-layer board that variable share is large enough that unit price dominates the conversation. On HDI it is the minority share, because the per-run engineering and tooling load is heavier — more drilling programs, more imaging steps, more sequential lamination — while the material per piece is not proportionally larger.
The practical consequence is the one worth planning around. Asking for a lower prototype unit price is asking for the wrong thing. The lever that moves a prototype budget is not price per piece; it is how many separate runs your project ends up buying before the design freezes. Two prototype iterations plus a low-volume build is three runs. One prototype iteration plus a low-volume build is two. Reducing that count is worth more than any discount you will negotiate on the pieces themselves, and the way you reduce it is by making the first run answer enough questions that a second one is not needed.
That framing sets up everything below. The question is not "how do I make HDI prototyping cheap" — it is "what do I have to buy in the first run so the ramp does not restart work I already paid for."
For a broader view of what drives HDI cost once you are at production volumes, where the negotiation genuinely is about specification trade-offs, the HDI PCB cost drivers and quote optimisation guide covers that side. This article stays on the prototype and low-volume end, where the arithmetic is different.
2. The build sequence sets how many times per-run work repeats
The largest single determinant of per-run cost on an HDI board is the build-up sequence, because the sequence dictates how many times the fixed steps repeat inside one run.
PCB168's published HDI capability covers 4–20 layers with stackups from 1+N+1 to 4+N+4, laser drilling to 0.075mm, microvia diameter ≥0.1mm, minimum line width/space of 2mil/2mil, any-layer interconnection and layer registration held to ±25µm. Those are the boundaries the process can reach. What matters for your quote is where inside those boundaries your design sits, because the notation itself is a count of repeated operations.
Read 1+N+1 literally: one build-up layer added on each side of a core, which means one laser drilling pass per side and one sequential lamination cycle beyond the core. 2+N+2 means the build-up happens twice per side. Each additional level is another imaging step, another laser drilling program, another lamination press cycle, another round of plating and inspection on that layer pair. These are not incremental adjustments to a single price — they are additional passes through the same machines, each with its own setup.
This is why HDI prototype quotes tend to move in steps rather than along a smooth curve. Going from 1+N+1 to 2+N+2 does not add a percentage; it adds a set of operations. On a prototype quantity, the whole cost of those extra passes lands on very few pieces.
Two things follow for how you treat the build sequence in a prototype RFQ:
State the sequence explicitly, do not let it be inferred. If you send layer count and a via list and let the supplier reconstruct the build, different suppliers will reconstruct it differently, and you will be comparing quotes for different products. Write the intended sequence in the notation the process uses, per side, and let the supplier confirm it or propose a change with reasoning.
Ask whether a shallower sequence carries your interconnect. Sometimes it does. A design drawn with stacked microvias spanning three levels may route with staggered vias across fewer build-up levels if the escape pattern permits, and the answer changes the number of per-run passes. Sometimes it does not, and pushing for it costs you routing you actually need. Whether your specific escape pattern tolerates it needs engineering confirmation against your stackup — it is a question to raise before tooling, not a specification to relax unilaterally.
The discipline here is that the sequence is a purchase decision made at RFQ time, not a property inherited from whatever the layout tool produced. If you want the mechanics of how build-up structures are formed before deciding, the HDI PCB manufacturing process guide walks through microvia formation and the 1+N+1 and 2+N+2 structures.
3. Sorting the quote into per-run and per-piece lines
Before you can decide what to buy once, you need the quote broken along the line that actually matters. Most HDI prototype quotes arrive as a unit price and a lead time, which hides the structure entirely. Ask instead for the quote split into charges that occur once per run and charges that scale with quantity.
A useful request, phrased so any supplier can answer it, is: *"Please separate the quotation into (a) charges incurred once per production run irrespective of quantity, (b) charges that scale with panel or piece count, and (c) charges that recur if the data revision changes."* That third category is the one buyers forget, and it is where prototype budgets leak.
Here is how the main line items typically fall. Treat this as the structure to ask about, not as a price list — the actual split and its magnitude differ by supplier and by design, and any specific figure has to come from your own quote.
| Line item | Behaviour | What triggers a repeat |
|---|---|---|
| Engineering review and DFM query handling | Per run | New data revision, or unresolved questions answered late |
| Imaging data and phototool generation | Per run, per layer | Any layer artwork change |
| Laser drill programs | Per run, per microvia span | Adding or changing a via span |
| Mechanical drill and rout programs | Per run | Outline, hole size or via structure change |
| Panel array layout | Per run | Outline change, quantity change that alters the array |
| Sequential lamination cycles | Per run, per build-up level | Build sequence change |
| Electrical test program | Per run | Netlist change |
| Test fixture, where a fixture is used | Per run, reusable across repeat orders of the same revision | Netlist or pad location change |
| Base material and laminate | Per piece / per panel | Material substitution |
| Wet process throughput, plating, finish | Per panel | Finish change |
| Impedance coupon measurement, where requested | Per run | Stackup or impedance target change |
| Cross-section on a coupon, where requested | Per run | Structure change |
| Expedite premium, where applied | Per run | Re-expediting a repeat run |
Two patterns in that table deserve emphasis.
First, look at how many rows say "any data revision." The cost of a design change in the prototype phase is not the cost of the boards you scrapped — it is the cost of regenerating every per-run item in the list. This is why a supplier's question during DFM review is cheap and your revision after tooling is expensive, and why answering engineering queries within the same working day is a genuine cost control measure rather than politeness.
Second, notice that a test fixture, where one is used, is per-run to create but reusable for repeat orders of the same revision. That makes it an asset you have already paid for — provided the revision does not move. Ask explicitly whether a fixture is being built, whether it is retained, how long it is retained, and what change invalidates it. If your low-volume ramp is the same revision as your prototype, that answer is worth money.
Where a supplier declines to split the quote at all, that itself is information. You cannot manage a cost structure you are not allowed to see, and a per-run/per-piece split is not proprietary. The HDI PCB quote package checklist covers what to put in the data pack so the split you get back is based on a single baseline rather than on assumptions.
4. Validation worth buying once in the prototype run
Now the central question. Given that per-run charges do not amortise, the prototype run is the cheapest opportunity you will ever have to buy structural validation — because the engineering, tooling and setup are already being paid for in this run whether you add the validation or not.
The test is simple: if a validation item would have to be repeated on the same tooling you are paying for right now, and its absence would send you back to a new run, buy it now. Below are the items that most often meet that test on a first HDI build. Whether each one applies to your design, and what class or condition to specify, needs engineering confirmation — the point is to ask the question at RFQ time rather than discover the gap after the ramp.
A cross-section on a coupon from the same panel. A cross-section is the only direct evidence of what the microvia and lamination stack actually became — via fill and connection at the target pad, plating in the microvia, layer alignment through the build-up, dielectric thickness between build-up levels. If you skip it in the prototype and something behaves oddly at assembly, you cannot cross-section retroactively on a panel that no longer exists. Specify the coupon location and reference the acceptance basis by name — IPC-6012 with a class you have agreed — rather than quoting numbers out of it.
Impedance measurement on a coupon, where you have controlled-impedance nets. If your design declares impedance targets, the prototype is where you confirm the stackup as built delivers them. Getting this after the ramp means either accepting untested impedance across the low-volume build or paying for another run. Ask for the measured coupon data with the stackup it was measured against, and require the report to state the test method by name.
Full electrical test on the netlist, not sampled. On a prototype quantity, the marginal cost of testing every net on every piece is small relative to the per-run test program you are already funding, and an open in a buried microvia span is not something visual inspection finds. Ask what the default test scope in the quote is, because "tested" sometimes means something narrower than you assume.
Registration and microvia evidence for the tightest feature in your design. PCB168's published HDI capability holds registration to ±25µm and drills to 0.075mm. Those are process boundaries; the question your prototype should answer is whether your particular combination — your microvia diameter, your pad size, your line width, your build sequence — lands comfortably inside them or at the edge. Ask for the evidence tied to your tightest feature rather than a general capability statement.
Assembly-relevant checks if this prototype will be assembled. Surface finish condition, solderability, and pad geometry at fine-pitch devices are worth confirming on a board you intend to populate. Reference the applicable acceptance documents by name — IPC-A-600 for the bare board, IPC-A-610 and J-STD-001 on the assembly side — and let the supplier state which class applies.
Documented as-built stackup. Not the stackup you designed — the one that was built, with the materials and thicknesses actually used. This is the input to every later decision, including whether a material substitution during the ramp is equivalent. It costs nothing to request and is expensive to reconstruct later.
What generally does *not* pass the test at prototype stage: environmental and reliability sequences that need statistically meaningful sample counts, and any test whose result would not change a decision you are about to make. Buying those on five pieces produces numbers you cannot act on. Reserve them for a qualification build with a sample plan agreed in advance.
5. What a "cheap HDI PCB" quote has usually left out
Searches for cheap HDI PCB and HDI PCB low cost manufacturing land on a real problem: HDI prototype quotes vary widely, and the cheapest number is sometimes a different product. Not because anyone is being dishonest, but because a quote is only as specific as the assumptions behind it, and unstated assumptions default to the cheapest interpretation.
When one quote sits well below the others, the difference is usually in one of these places. None of them requires suspicion to check — a direct question resolves each one.
A shallower build than you intended. If the sequence was inferred rather than stated, the low quote may be for fewer build-up levels, with stacked microvias reinterpreted as staggered or a span reassigned to a mechanical via. Ask which sequence was quoted, in per-side notation.
A relaxed line width across the board. Your design may need 2mil/2mil in a BGA escape region only. A quote priced at a looser board-wide minimum is cheaper and may be perfectly adequate — or it may not carry your escape. Ask what minimum line width and space the quote assumes, and confirm it against the tightest region rather than the average.
A narrower test scope. "Electrical test" can mean full netlist test on every piece, or something less. Ask for the scope as a line item.
No coupon, no cross-section, no impedance data. These are the items from the previous section. Their absence is the single most common reason one HDI prototype quote is lower than another, and it is exactly the saving that costs you a run later.
A different material within the same family. PCB168's published HDI material families are FR-4, BT and ABF. A quote against a different grade inside the family you named is not the same board if your design has impedance or thermal requirements tied to the material. Ask for the specific material and construction the quote assumes.
Reports not included. As-built stackup, test report, measurement data and certificate of conformance can each be inside or outside a quote. Ask which documents ship with the boards.
A longer lead time, or an expedite premium in the other quotes. Sometimes the cheap quote is simply the slow one, which may be entirely fine. Confirm the lead time each quote assumes before treating the difference as a saving.
Panel utilisation assumptions. Outline dimensions interact with the array. A quote may assume an array your outline does not actually permit, or may have applied a different array than a competing quote. Ask how many pieces per panel the quote is based on.
The efficient way to handle all of this is to state the assumptions yourself in the RFQ so that every quote answers the same question. When you supply the sequence, the tightest feature, the test scope, the coupon requirements, the material and the document list, price differences become comparable — and a genuinely lower price becomes visible as a real advantage rather than a question mark.
If you are also weighing suppliers rather than just quotes, the HDI supplier capability evidence shortlist covers the qualification questions that sit alongside the commercial ones.
6. Freezing the right inputs before the low-volume ramp
The transition from prototype to low-volume production is where per-run charges either get reused or get paid again. What determines which one happens is whether the inputs that drive tooling stayed frozen.
Work through these before you place the ramp order, and treat any change as a decision with a cost rather than a detail.
Data revision. The ramp should quote against the same revision as the validated prototype. If a change is genuinely required, group it with every other pending change into a single revision rather than issuing several. Each revision boundary is a fresh set of per-run charges.
Outline and panel array. A small outline adjustment can change how many pieces fit a panel, which changes the array, which regenerates the array layout and can move the effective unit cost more than the outline change appeared to justify. If the outline must change, ask for the array impact before approving it.
Build sequence. Unchanged from the validated build, or you have not validated the thing you are ramping.
Material and construction. Same material family and grade, same construction. If a substitution is proposed for availability, ask for the equivalence reasoning against your impedance and thermal requirements, and route it through formal change approval rather than accepting it as a like-for-like swap.
Netlist. Any netlist change invalidates the test program and any fixture built against it.
Surface finish. A finish change affects both the wet process and assembly, and it invalidates solderability evidence from the prototype.
Acceptance basis. The same standard and class you validated against. Silently tightening acceptance at the ramp is a common source of dispute, because the prototype was not built or measured to the new basis.
Test and report scope. Confirm which prototype-stage items continue into the ramp and which were one-off. Some validation genuinely does not need repeating; some does. Decide it explicitly rather than by omission.
Alongside the frozen list, ask two commercial questions the ramp quote should answer. First, tiered pricing across the quantity breaks you might actually order, so you can see where the per-run share stops dominating. Second, which charges from the prototype run are not repeated because tooling is reused — that number tells you how much value your frozen revision preserved, and it is the strongest argument available for resisting non-essential changes.
On the lead-time side, PCB168 publishes prototypes typically shipping in 3–5 working days; whether that applies to your specific build depends on the sequence, material and validation scope, so confirm the lead time for your configuration with engineering rather than assuming the published figure covers every HDI construction.
7. The prototype data pack, written to prevent a second run
Everything above reduces to a data pack that leaves no assumption for the supplier to guess. This is not a general Gerber checklist — it is the subset that specifically prevents a per-run charge from recurring.
- Build sequence in per-side notation, stated rather than implied, with the core identified.
- Stackup with layer order, dielectric assignments and target finished thickness, plus a note on whether thickness is a hard constraint or has tolerance.
- Every via span enumerated — which layers each span connects, which spans are laser-drilled microvias, which are mechanical, and where vias are stacked versus staggered.
- Tightest feature called out by location, not just as a board-wide minimum: the region that needs the finest line width and space, and the smallest microvia diameter with its pad size.
- Material family and grade, with a statement on whether substitution requires approval.
- Impedance targets with the nets they apply to, and whether coupon measurement is required.
- Netlist for electrical test, with the required test scope stated.
- Coupon requirements: cross-section location, impedance coupon, and what the report must contain.
- Acceptance basis by name and class — the standard, the class, and any deviation you have agreed. Do not paste numbers from a standard into your drawing; reference it and let the class carry the requirement.
- Document list to ship with the boards: as-built stackup, test report, measurement data, certificate of conformance.
- Outline with any dimensions that cannot move, so array assumptions can be checked against reality.
- Quantity for the prototype and the expected ramp quantities, so tiered pricing and array planning happen at the same time rather than twice.
- A named engineering contact and a commitment on query turnaround — because the fastest way to add a per-run charge is to answer a DFM question after tooling has started.
One more item that is not a file: state that the prototype is intended as the tooling baseline for the ramp. Suppliers plan differently when they know a build is a one-off versus the first of a series, and saying so invites the retention questions about fixtures and tooling that you want answered up front.
If the design is being laid out externally, the ownership of these inputs needs to be settled explicitly; the HDI PCB design outsourcing and DFM collaboration guide covers who holds which decision.
8. FAQ
Why is an HDI prototype so much more expensive per piece than the production quote I was shown?
Because most of an HDI build's cost is spent once per run — engineering review, imaging data, a laser drill program per microvia span, panel array layout, lamination cycles, test program — and prototype quantities give that fixed spend very few pieces to spread across. The production unit price you were shown assumes those charges are divided across a much larger run. The gap is arithmetic, not a markup.
What actually gets cheaper when I order more?
Material, panels through wet processing, and the labour and machine time that scale with piece count. Per-run engineering and tooling does not, which is why the unit-price curve flattens as quantity rises rather than continuing to fall.
Is it cheaper to combine my prototype and low-volume order into one run?
Often yes, because you pay the per-run charges once instead of twice. The risk is that you commit the full quantity before validation results exist. The judgement is whether your design confidence justifies it. A middle path is to order the ramp quantity against the same revision immediately after prototype validation passes, while tooling is still current — ask the supplier how long tooling and any fixture are retained.
Which validation items are worth buying on a prototype quantity?
Ones that need the panel that is being built right now: a cross-section on a coupon from the same panel, impedance measurement where you have controlled-impedance nets, full netlist electrical test, evidence tied to your tightest feature, and a documented as-built stackup. Reliability sequences that need statistically meaningful sample counts generally do not belong on five pieces. Which items apply to your design needs engineering confirmation.
One HDI quote is far lower than the others. What should I check first?
The build sequence it assumes, the minimum line width it was priced at, the electrical test scope, and whether coupons, cross-section and impedance data are included. Those four account for most large gaps. Then check the material grade, the document list and the lead time.
Can I ask for 2mil line width only where I need it?
That is exactly the right way to ask. PCB168's published HDI capability includes 2mil/2mil minimum line width and space, with fine line 3/3mil in the feature list. Applying the tightest value board-wide when only a BGA escape region needs it changes how the whole board is processed. Identify the region, and let engineering confirm the window for that region against your stackup.
Does changing my board outline before the ramp cost anything?
It can cost more than it looks. Outline dimensions determine how many pieces fit a panel; a change can alter the array, which regenerates the array layout and shifts the effective unit cost. Ask for the array impact before approving an outline change.
What lead time should I expect for an HDI prototype?
PCB168 publishes prototypes typically shipping in 3–5 working days. Whether that applies to a specific HDI construction depends on the build sequence, material and validation scope, so confirm the lead time for your configuration rather than assuming the published figure covers every build.
Do I need to specify the build sequence, or will the supplier work it out?
Specify it. If suppliers infer the sequence from layer count and a via list, they will infer differently, and you will be comparing quotes for different products. State it per side and let each supplier confirm or propose a change with reasoning.
9. Where to take this next
If you are preparing an HDI prototype order, the two things worth doing before you send anything are: write the build sequence and the tightest feature into the RFQ explicitly, and decide which validation items you want in this run rather than the next one.
You can review the published HDI process boundaries — 4–20 layers, 1+N+1 to 4+N+4, 2mil/2mil minimum line width and space, laser drilling to 0.075mm, microvia diameter ≥0.1mm, FR-4/BT/ABF materials, any-layer interconnection and ±25µm registration — on the HDI PCB page before deciding where your design sits inside them. Send the stackup, via spans and netlist through the quote form for a build-specific answer, or raise the sequence and tightest-feature questions directly with engineering via contact. If HDI is one of several board types in the same program, the capabilities overview covers the wider process set, and the multi-layer PCB stackup guide is useful background if part of your project is conventional multilayer rather than HDI.
Images
- Cover
/images/products/ax47.jpg— alt: "Stack of copper-clad laminate panels interleaved with kraft paper slip sheets on a pallet beside an idle automated processing machine, control panel lit and the feed roller bay empty." Concept: setup and material loading happen once per run, independent of how many pieces the order contains — the visual anchor for the per-run versus per-piece distinction.
---
Need PCBs for Your Project?
Get an instant quote — prototypes from $2, delivered worldwide.
Get Instant Quote